If you have played any vintage video game or watched an animated movie, you have witnessed the magic of ray casting. Simply put, it is simulating how light interacts with the objects around it. It is used to generate 3D perspectives of the surroundings by analysing the volume of light interacting with each object.
I recently built my own version of a 2D Ray Caster inspired by Coding Train on YouTube and in this article I will be explaining the process behind it. You can find a demo here: https://www.linkedin.com/feed/update/urn:li:activity:7008321750664929280/
I built this project using Golang and the Pixel graphic library. It provides APIs to draw lines and shapes along with heavy duty stuff to create full fledged games. Pixel does it by running a loop that updates the canvas 60 times per second (or the monitor’s refresh rate). Inside this loop, it checks for buffers which hold the order and coordinates of the objects that need to be drawn on the canvas. It is the responsibility of the developer to update the buffer based on events like user input or triggers.
Let’s start by defining the entities present in our project.
1. Window: It is the area which will hold all the other entities, including our light source and boundaries.
2. Boundaries: These are randomly generated lines placed within the window area that will act as the obstructions for light.
3. Particle: This is a circle that projects lines in all 360 degrees. These lines are rays and the particle acts as our light source.
4. Rays: These are lines projected from the particle which act as light rays.
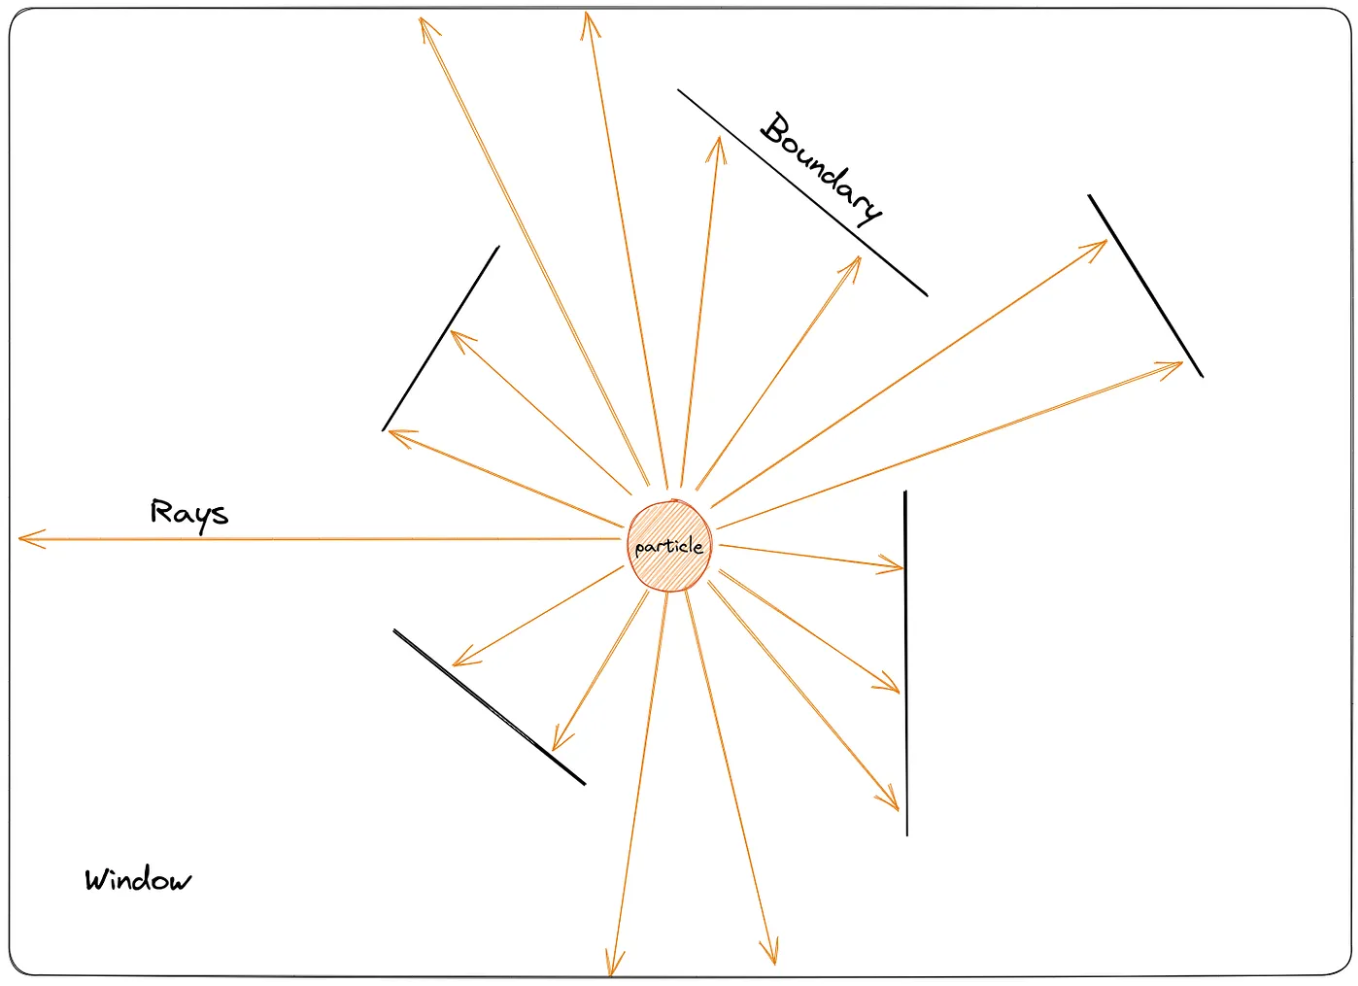
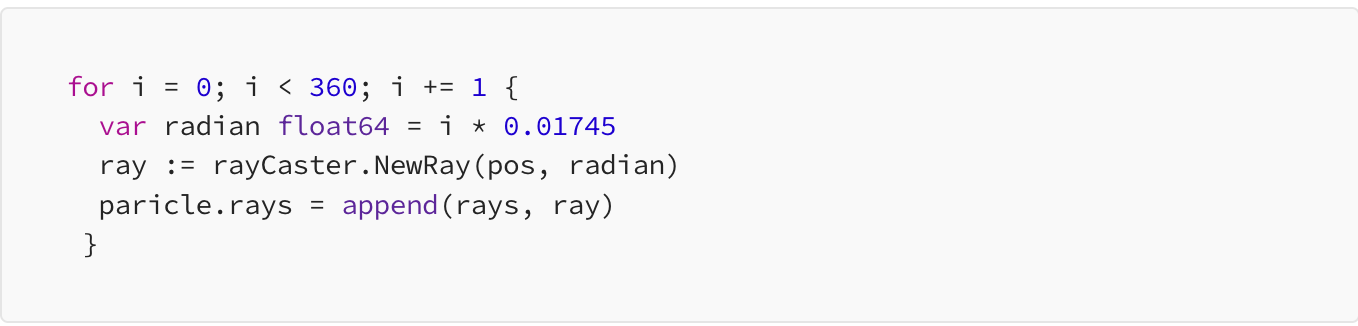
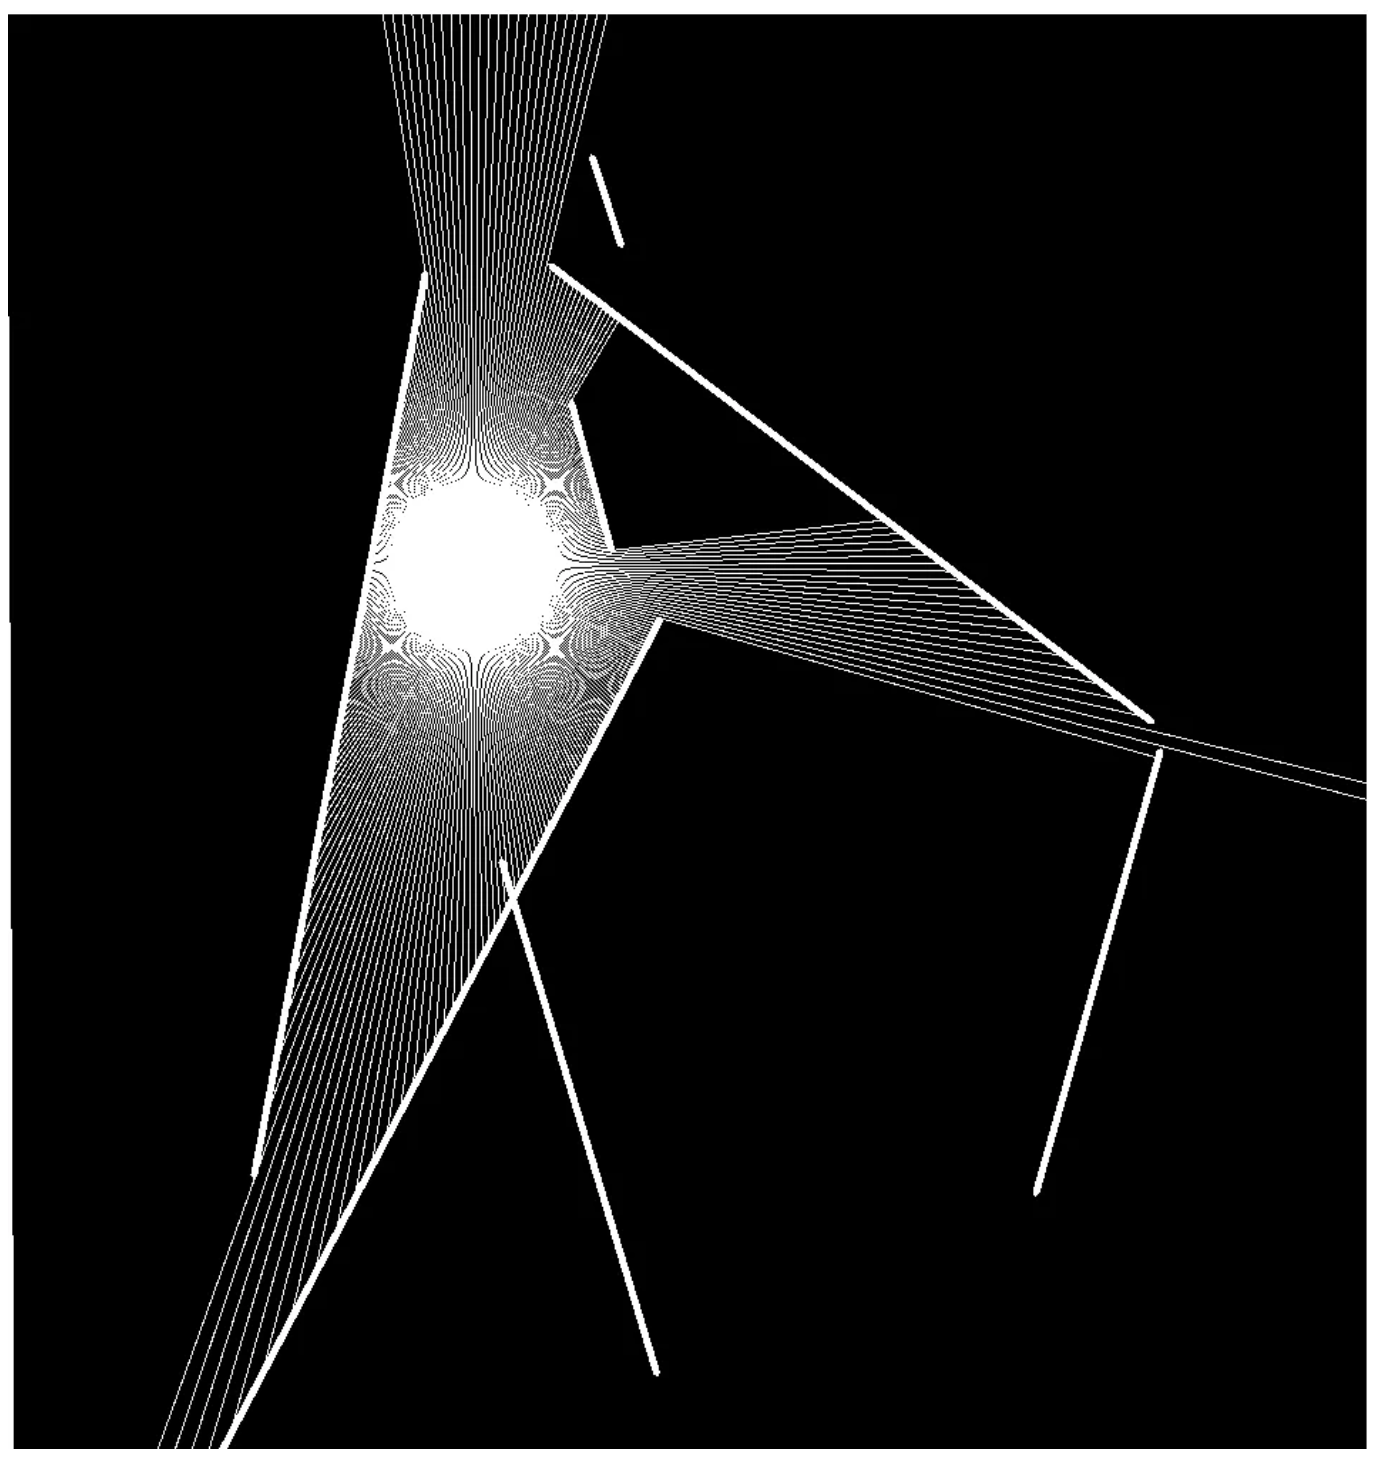
Once we are done placing random boundaries in our window, we will create a particle and place it at the centre of our window. Our particle is initialised with a list of rays that project outward at every angle.
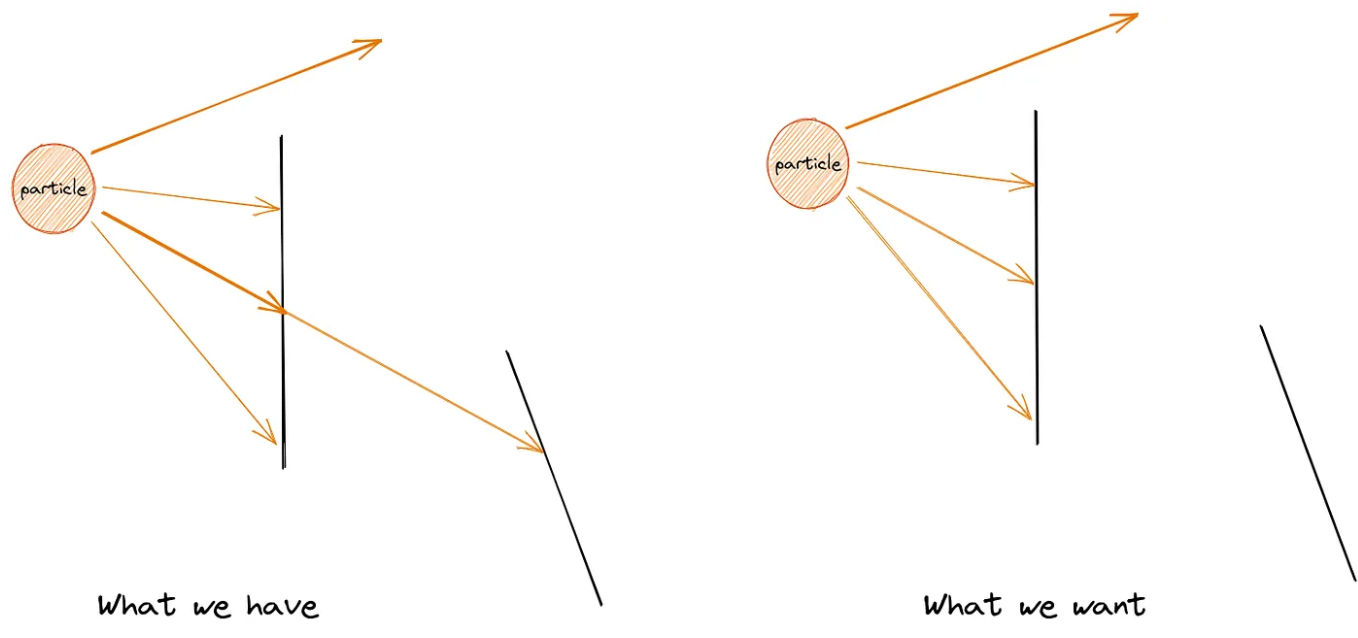
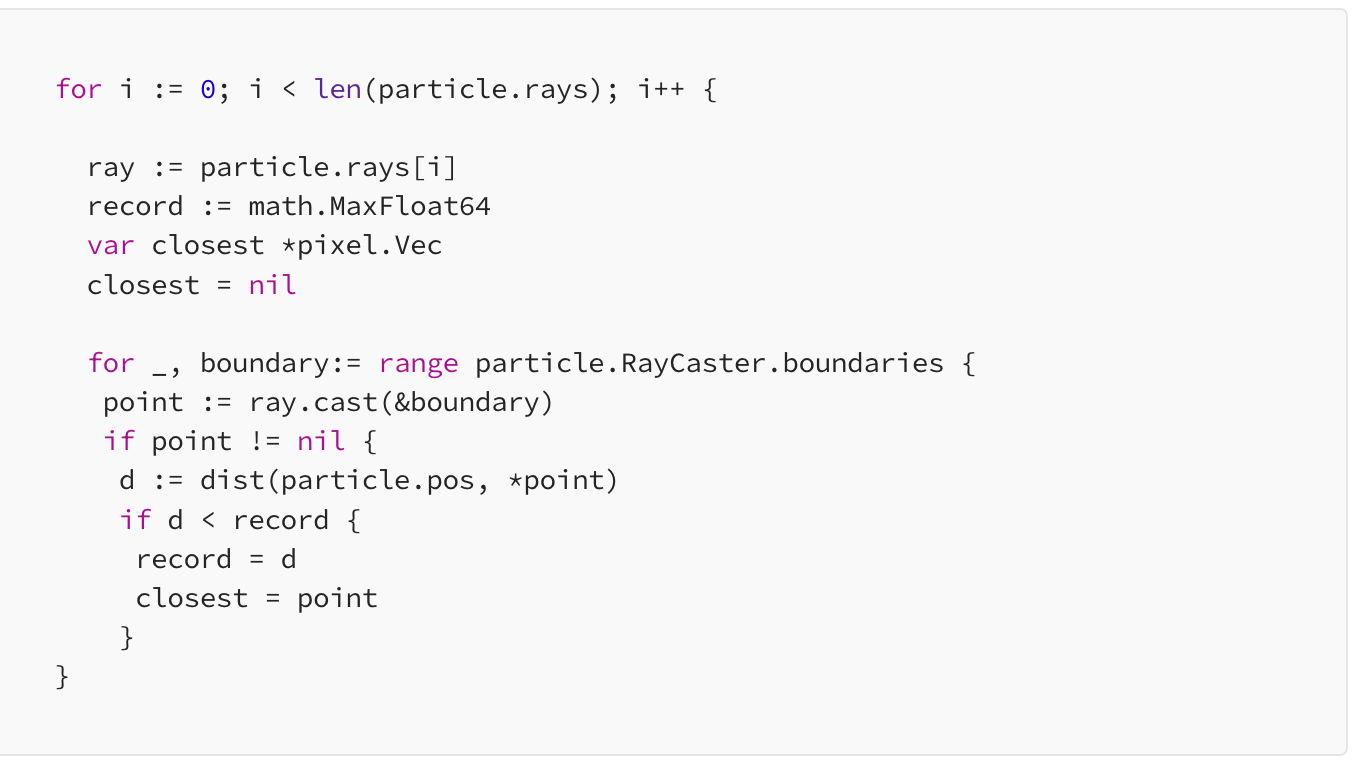
Next, we will call the look( ) function of our Particle that casts each ray to each of the boundaries in our window and then renders all the rays that are intersecting with any boundary.
There is a catch tho, when we check if a ray intersects with a boundary, we also need to make sure that we only render the ray up until the closest boundary, else we will have rays that pass through a boundary because they are intersecting somewhere further back.
In order to check whether our ray intersects with a boundary, we are incorporating some basic mathematics.
For two lines:
line 1 : (x1,y1) (x2, y2)
line 2: (x3,y3) (x4,y4)
intersection happens if 0 ≤ t ≤ 1 and 0 ≤ u ≤ 1
where:
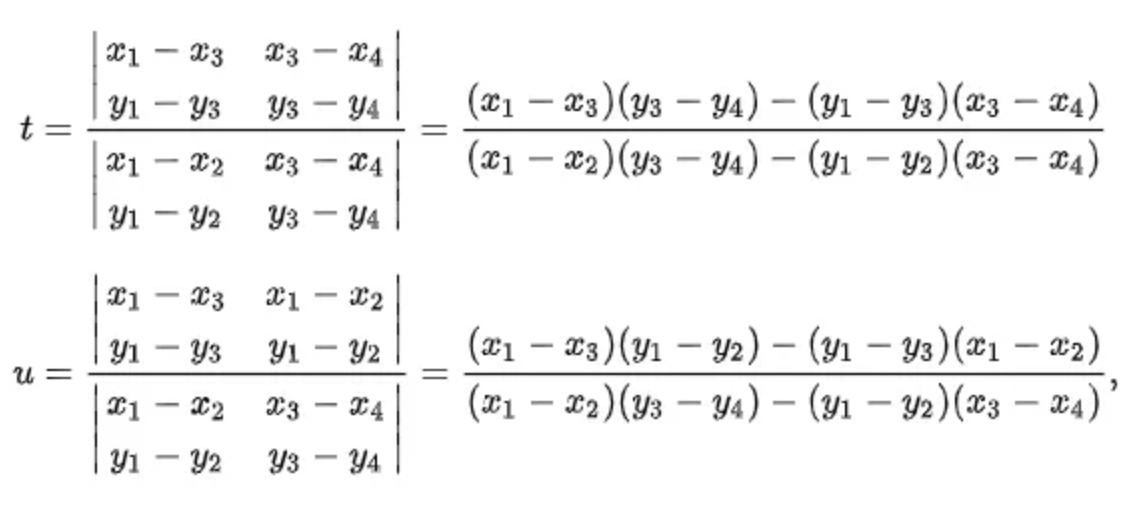
with the point of intersections being:

However, this applies to line segments whereas in our case we only have one line segment (the boundary) while the other is a ray. Therefore we will have to tweak our u to be greater than 0.
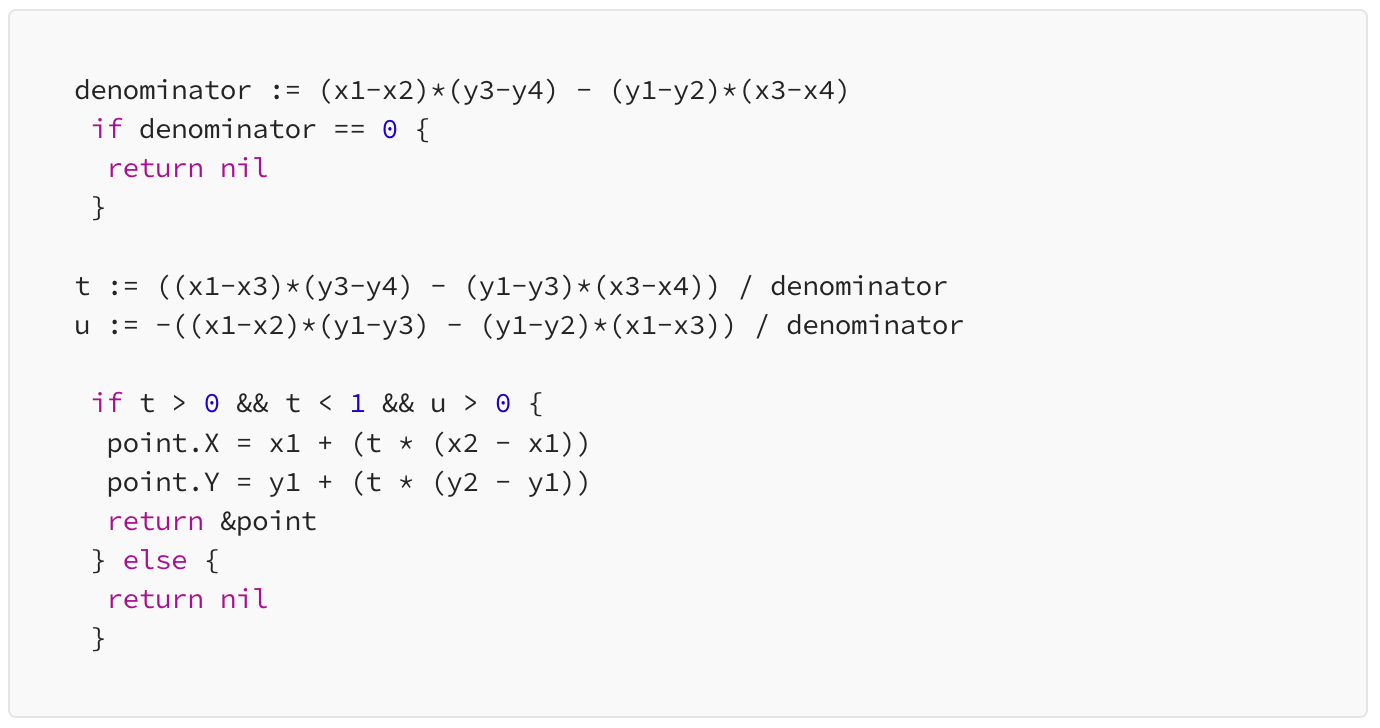
We need to return nil if the denominator is 0 because that means the ray is parallel to our boundary and will never intersect.
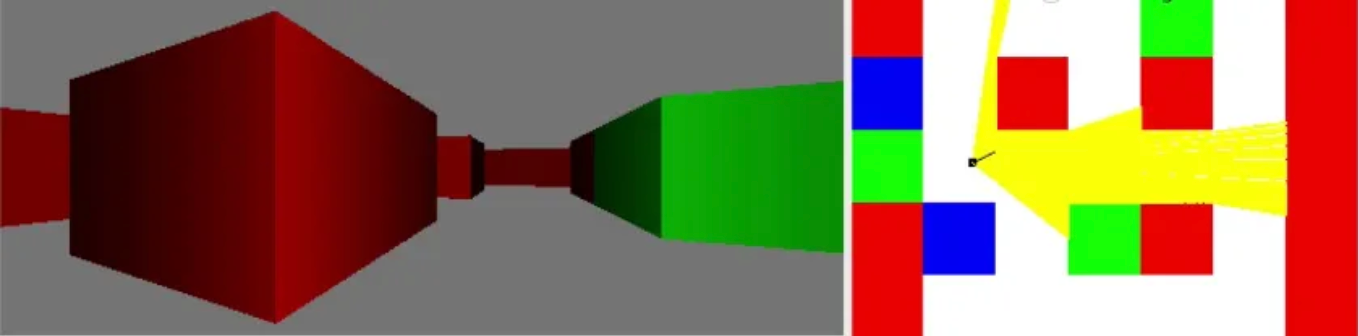
Our ray caster works as expected, however the light source is static and fixed.
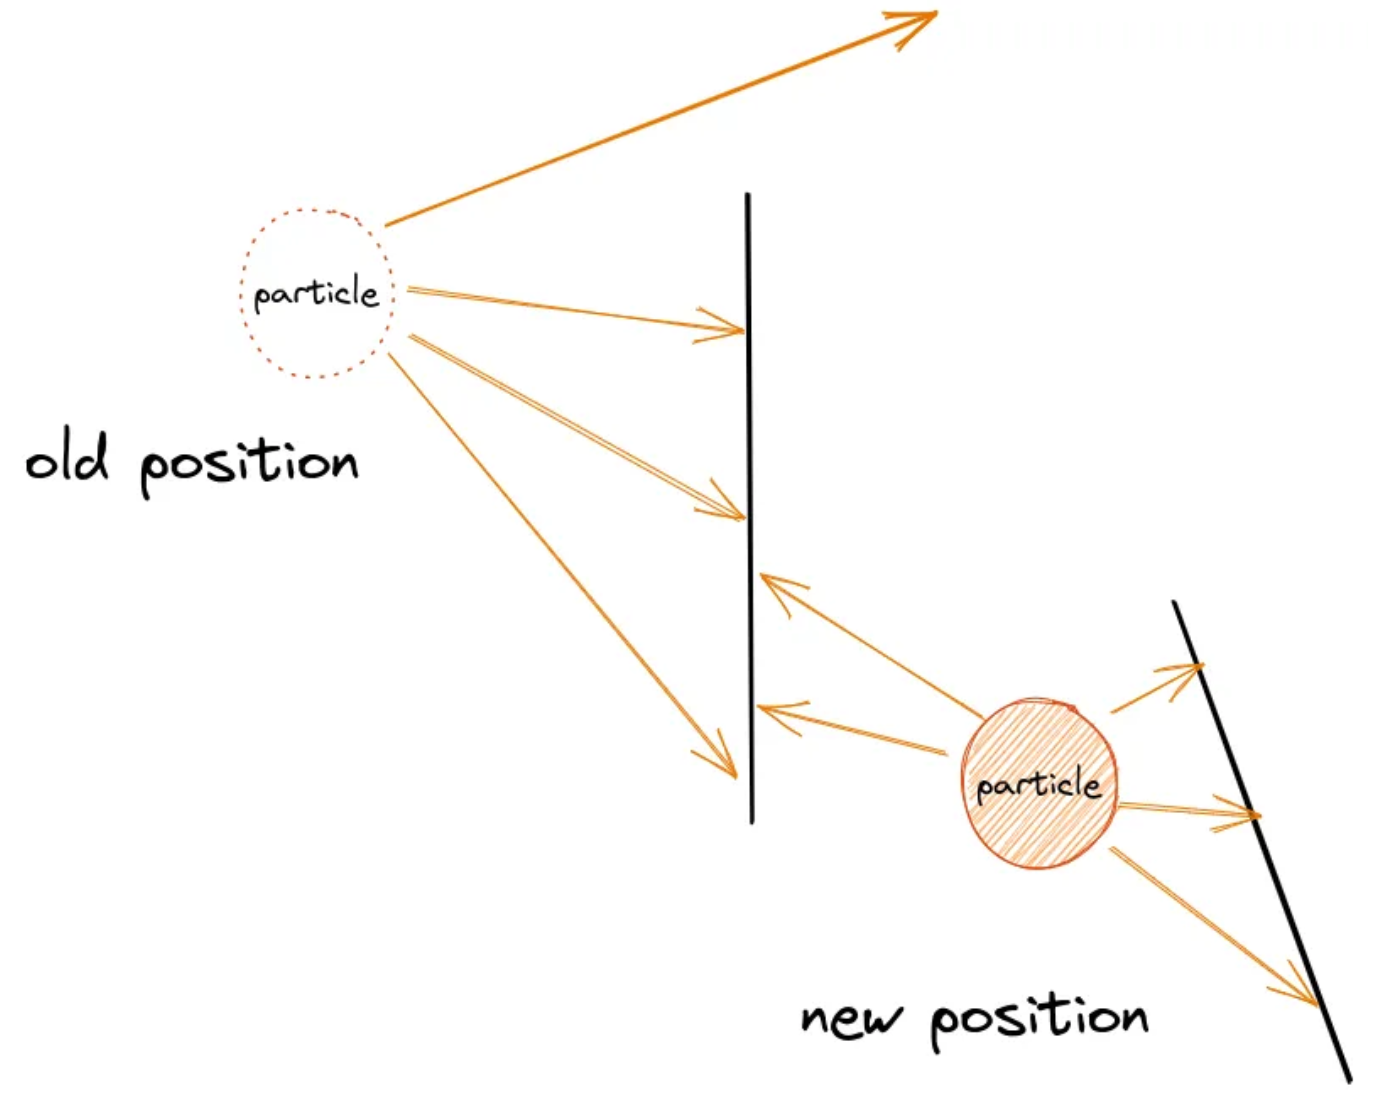
Once our particle is projecting rays in all directions and the rays are cast against all walls, it is time to move the particle around and see how the interactions change.
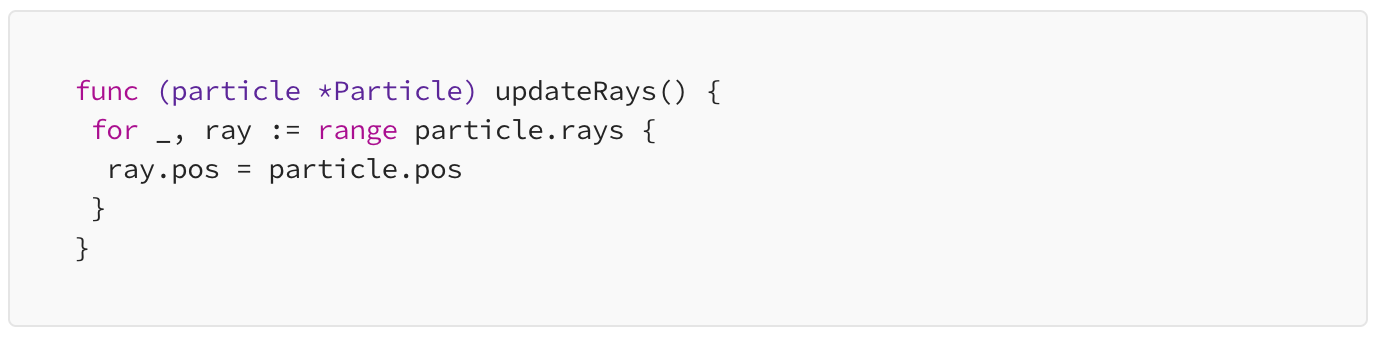
Something to take care about here is that all the rays are emerging from the particle which is currently static. Which means all the rays have a fixed starting point. However when we move the particle around, we need to update the starting point of the rays and sync it with the position of the particle.
We are done with our implementation of a simple 2D ray caster. We can use this to generate a 3D surrounding and perhaps that will be a potential project for me. Another cool use case would be to incorporate it with a neural network and using it to automatically find paths, like in a self driving car.
You can find the full source code here: https://github.com/pi-rate14/2d-raycasting